




My Sticky Gadget

Friday, May 30, 2014

Baby Gear for Second-time Mom


While I was pregnant with Luke, I went on a research rant, researching for weeks at a time the best and most useful products to have for a baby. I always kept second baby in mind whenever I got something. I thought I had everything I needed for our second baby, and I did but the baby gear I had for my first didn't work for my second. It's really true what they say, "Second baby will be completely different than the first." I didn't use half the things I had for my son with my daughter. What worked on him didn't work on her. And having 2 kids under 2 I've learned the less things you have the better and finding the right baby gear is key to making it through a trip outside the house run somewhat smoothly.


1. I will admit, I am a stroller junky, I went through 2 different strollers before I got to the City Select and I can honestly say it's the best stroller I've ever owned. I started out with the Uppababy Cruz and I loved it a lot but once I found out I was pregnant I knew I would need a double stroller. I sold the Cruz and I got the Uppababy Vista. Again, I loved the Vista as well but the second seat that comes with the vista only faces inward and my son HATED that. 
With a little research I found the City Select and I can honestly say it's the best stroller I have ever pushed. And because the wheels are air filled I even use it to go jogging! It really is an all-in-one travel system.


2. I didn't have the Rock 'n Play sleeper with my son because he hated to be put in a bouncer, sleeper, swing, etc. I thought I would give it a try with my daughter and it is amazing in every way! She loves to sit in it because it keeps her cuddled. It's truly been a huge help to put her in there while I feed big bro or do daily chores around the house. 


3. This one is probably my most loved product. The Wrap from Solly Baby I've tried many carriers and wraps with my son and I can honestly say the Solly Baby is the best I've used. The wrap is super light but very strong at the same time. I can easily throw it in my diaper bag because it's not bulky. Ellie loves to be in the wrap because she feels close, warm, and cuddled next to mommy. And I love it because it allows me to be hands free which is very convenient when you have to run around after a hyper little boy.


4. The Gumdrop pacifiers are a must in our house. We started out with them at the hospital and we've stuck with them because they are easy to clean, and the kids love them. We didn't try to change them just because they were such a big hit with Luke.

5. Oh and I'm a diaper bag junky too. I can't even tell you how many bags I went through but one that has made my life a lot easier has been the Vera Bradley Backpack. It's spacious and organized with all the pockets inside. Best of all it lets me be hands free, not having to worry about it falling down my shoulder while I care for my little people. 

6. Ah, the glorious Vitamix. Mornings are pretty active in our house and I always try to make Luke a healthy, big breakfast and I owe it all to the Vitamix for helping me make yummy protein packed smoothies. It helps me make smoothies in seconds and the clean up is probably easier than making the drink. 


7. Last but not least are the Aden + Anais swaddle muslin blankets. Ellie loves to sleep with something touching her cheeks and these are perfect because they are so light and airy. I also use these to cover the car seat when we're out in the sun, as a cover up when I'm nursing, and use as burp cloths.

These are some of the main things I use on a daily basis to help make my life a little easier. Having 2 babies under 2 isn't easy but I found that these products have helped me have a smooth-er day. 
What are your favorite baby items?


Wednesday, May 7, 2014

No-Sew Bench Cushion

 I gave up searching for the right bench to put in my entry way, after I couldn't find exactly what I was looking for and if I found something it was ridiculously expensive.  Since we are DIY people I just got my hubs to build me a box with a lid that would open and close. I finished it off with a coat of paint and SUPER easy no-sew cushion. Don't you love the words NO-SEW?! I do!

Materials:
2 in. foam (Jo-ann)
Fabric (Jo-ann)
Spray adhesive
Knife
Yard stick
Stapler & staples (Home Depot)
Batting*

*I forgot to get batting when I was at the store and I didn't have the time or patience to go back, so I make it without the batting and it turned out perfectly fine! 


I started out by wiping the wood with a dry cloth and cutting the foam to fit on the piece of wood.
I sprayed the wood with adhesive and let it sit for about 2 minutes.
I then placed the already cut foam on the sprayed surface.
Drape the fabric on top if the foam.
Flip the whole thing over (you might need help with this), and staple to the back of the wood.
Nicely tuck in the corners and staple everything shut.
Voila!
Have you seen my NO-SEW headboard?

Friday, April 4, 2014

Nutella Cream Pie + Encouragement


I started getting into the groove of things now that I have a newborn around. My days are packed with cooking, cleaning, caring for my little ones-- going to the park, mall, and play dates-- more cooking and more cleaning. I have a lot of moms ask me how I manage to keep my house clean, caring for 2 kids under the age of 2 and still have time to bake a cake... or in this case a pie. 

I want this blog to be a real blog, and by that I mean I don't want to pretend I have a perfect life, house, kids, etc. I don't want this to be a blog where a mom (or any person) feels horrible after seeing nice pictures of a meal or dessert or an Instagram picture of a clean room and think to herself, "Wow, this lady does it all and I don't even have time to grab a meal."
So, I want to encourage you and tell you that I don't have a perfect house, or kids, or life but I am so thankful for all of it. 80% of the time my house has toys everywhere, I feel like I'm constantly washing dishes and doing laundry-- oh and changing diapers. Half the time I'm either running around after a very hyper little boy or I'm nursing my sweet baby girl. I'm lucky if I can get 5 minutes to sit down and get a few bites of food in my mouth. 
Thankfully my kids nap at the same time, that's when I have time to clean, cook, sew, or just sit on the couch and do NOTHING! My life never has a boring moment anymore and I'm very happy and content with all of it. So, next time you see a picture of a clean room, a nice meal or dessert it's either after nap time or my sweet and very helpful husband is around.
I made this pie on a good day with Luke sitting quietly next to me and Ellie snoozing in her rocker. It was a great day and I really enjoyed baking it. 


I cheated a little bit and used a store bought Oreo crust. If you prefer to make your own see original recipe from Livin the pie life.

Nutella Cream Pie 

Filling
1- 8oz cream cheese, softened
2/3 cup of Nutella
1/2 cup semi-sweet chocolate chips, melted
1/4 cup white sugar
1 teaspoon vanilla extract
pinch of sea salt
1 egg
1/4 cup toasted hazelnuts, finely chopped


Topping
1 cup heavy cream
2 tablespoons white sugar
1 teaspoon vanilla extract
1/4 cup toasted hazelnut, coarsely chopped 


Preheat oven to 325 degrees F
In a mixer, blend together cream cheese, Nutella, melted chocolate, sugar, vanilla, and salt. Mix until thoroughly incorporated, about 1 minute. Add egg and mix for 1 minute, until smooth and creamy. Fold in the chopped hazelnuts.
Pour into Oreo crust and bake for 30 minutes until center is just set.
Let it cool all the way through.

Whipped Topping
In a mixer, blend cream, sugar, and vanilla until soft peaks form. Spread the whipped cream over the cooled pie, sprinkle with chopped hazelnuts, and drizzle warm Nutella on top.


Tuesday, March 25, 2014

DIY Yarn Rosette Wreath


Since the weather has been really nice here in the good 'ol south, I've been doing a lot more crafts. I think being able to get out and feel the warm sun brightens up my spirit and makes me be more productive, I'm probably not alone. Since we are officially into the spring season, I decided to make a wreath for my own door. I went with a bright fuchsia for the felt rosettes and grassy green for my monogram letter, I felt like those two colors pared together with a black and white wreath ring would scream-- HELLO SPRING!!!
Scroll on down to see how I made this wreath, and YOU can make it too!!!
 
As I started wrapping the wreath ring I realized I forgot to take pictures, but you get the idea so far right?
 
    
Start with a plain wreath ring, tie a knot with the yarn to start your wrapping. Continue wrapping your wreath with white and black yarn 'till the whole wreath is covered. 

 
 I realized when I got to the end that I had a wider section of white yarn but I wasn't worried about it because I knew the rosettes would cover it. Don't sweat if this happens to you. It's an easy fix.
 I used the same technique for making the rosettes as I did in my DIY rosette wreath tutorial but instead of cutting a circle out of the felt, I cut an uneven rectangle to give the effect of flower petals throughout the rosettes. The bigger you cut your felt the larger the flower will be. I made a total of 14 rosettes for this wreath.
As for the leaves, cut a small piece of felt, fold over, and cut a curved line voila! You have a cute leaf.  
 I gave the monogram letter 3 coats of paint in the color lily pad green.
 

 Arrange the rosettes, and hot glue everything together.
Happy Spring everyone!! 

Tuesday, March 18, 2014

Thank you + Spring Wreath GIVEAWAY!

  
 Trees are blooming, grass is sprouting, and warm sweet air is flowing through Georgia! What better way to welcome the spring season than with a giveaway that will make an ordinary front door look ready for spring. 
Before I go on, I want to take a second to thank all of you for the sweet support in reading my blog, following me on Facebook, Instagram and sending sweet encouraging comments and emails. I love sharing recipes, DIY projects, and everyday life with you. Knowing I can help someone save money, make a delicious dish, or being an encouragement is very rewarding. 
So, THANK YOU from the bottom of my heart! 


Follow the easy steps below to enter this giveaway!!! 
Ends March 25
Lucky winner will receive this grapevine wreath with crisp green bushes, a chic burlap bow, and hand painted monogram letter of your last name to top it off.
Made with love by yours truly.
  a Rafflecopter giveaway


 photo PicMonkeybannerCollage_zps370c8a73.jpg

Pin It

Friday, March 14, 2014

Banana Muffins


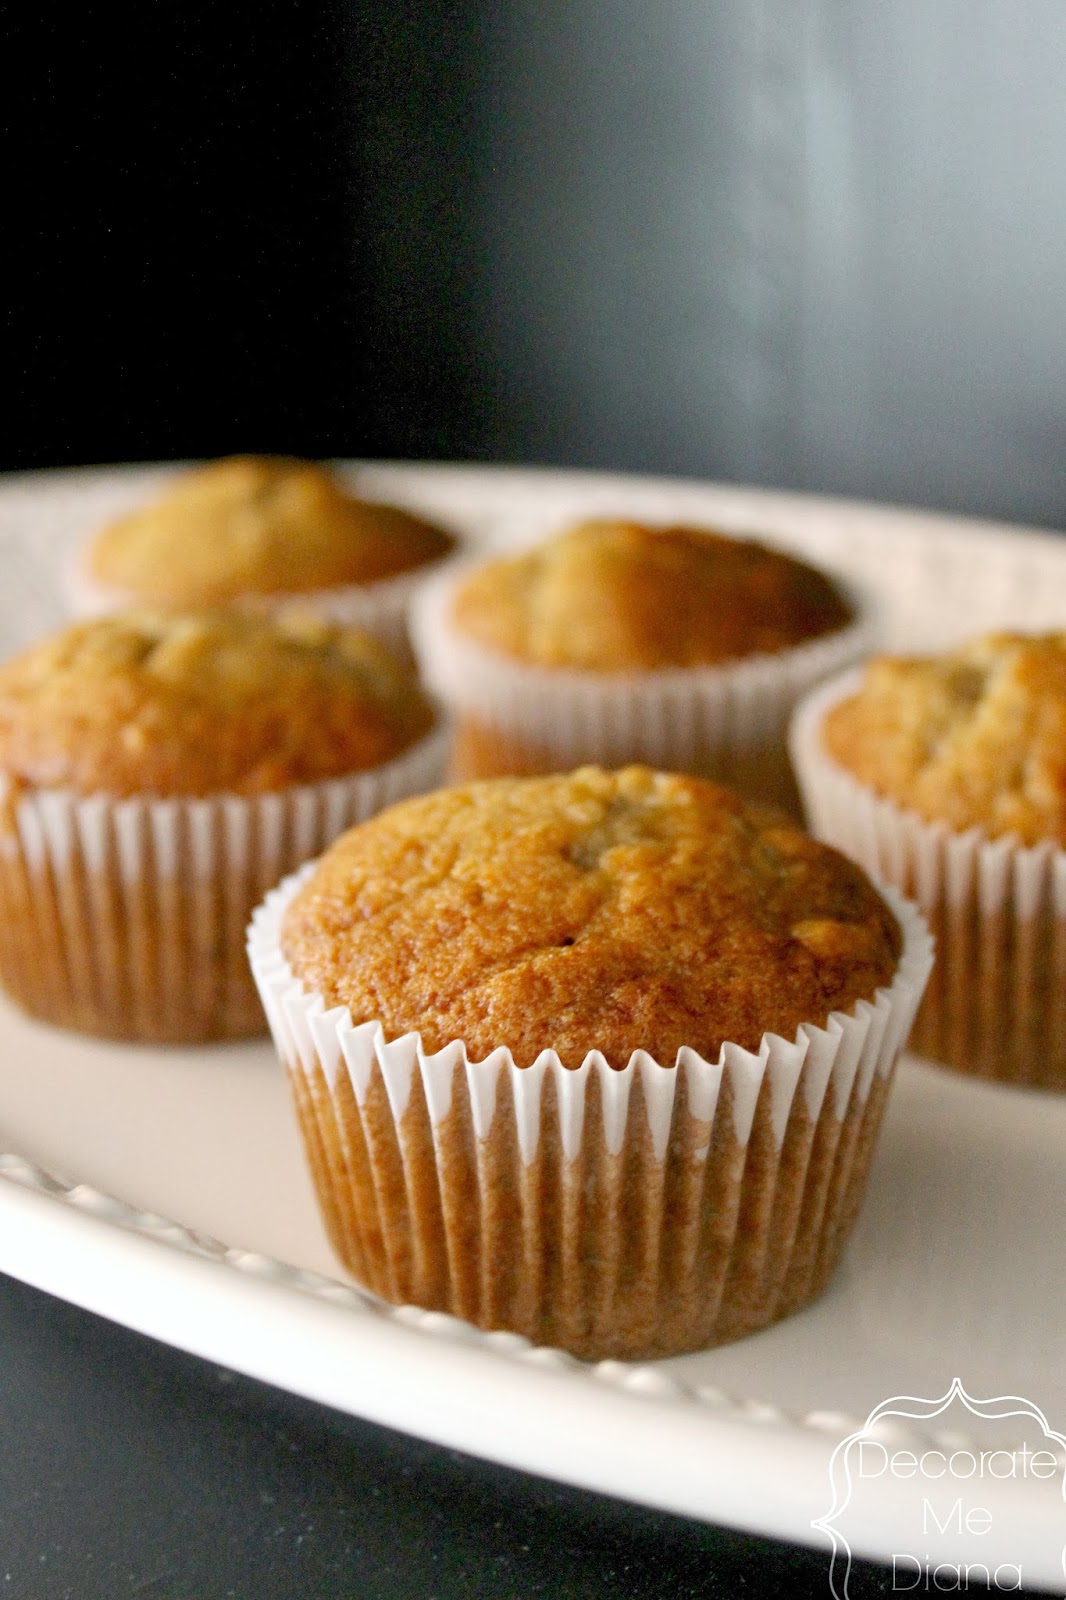
Bananas tend to get brown really fast, as in one day they are perfectly yellow and the next day they are brown and ripe. I had 3 bananas that were really ripe and I was about to toss them out, when I thought I could make banana bread or muffins with them. I found an awesome recipe that requires ingredients you probably already have in your pantry and one bowl to mix everything in. Yes, you read correctly, you only need one bowl! No extra dishes to clean. Not to mention the muffins turn out very moist and soft. 

Banana Muffins

3 ripe bananas 
1/3 cup melted butter
1 cup sugar
1 egg, beaten
1 tsp. vanilla 
1 tsp baking soda
pinch of salt
1 1/2 cups all-purpose flour 


Preheat oven to 350 F. In a large bowl smash bananas and mix in melted butter. Add sugar, egg and vanilla and mix. Sprinkle baking soda and salt over the mixture and mix well.  Add the flour and mix everything until smooth. Line a muffin pan with liners and spoon mixture half way into the cups. Bake for 20 minutes or until muffin tops are a light brown color. Enjoy! 

Recipe from Simply Recipes


 photo PicMonkeybannerCollage_zps370c8a73.jpg

Pin It

Wednesday, March 5, 2014

Coconut Chia Rice Pudding


Happy hump day! A few months ago my mom introduced me to these tiny little things called Chia seeds. They are these small, dry, white and black seeds that are packed with a bunch of goodies that are very good for you such as, omega-3 fatty acids, protein, fiber, antioxidants, and calcium. As I mentioned, they are dry but when these little things get wet a gel forms on the outer part of the seed making them slippery. I've added chia seeds to smoothies, granola bars, even cookies to help give me a boost of energy. 
Today, I want to share with you another sweet recipe, but this time using chia seeds. Coconut chia rice pudding! It's a sweet, comforting dessert that is perfect to have any time of year.

Coconut Chia Rice Pudding

1 cup of short grain rice (sushi rice)
1/2 cup of whole milk
4 cups (2 cans) of coconut milk
1/2 cup of white sugar (add more or less if desired)
1/4 cup of chia seeds

Place rice, whole milk, coconut milk, and sugar in a heavy pot over high heat. Bring to a boil, let boil for 1 minute, turn down heat to low and cover. Stir frequently. Cook on low for 25 minutes, until it's nice and creamy and the rice is soft. Let cool for 5 minutes, then stir in the chia seeds.
Serve warm or cold. 


 photo PicMonkeybannerCollage_zps370c8a73.jpg

Pin It