My Sticky Gadget

Monday, September 22, 2014

DIY Fall Burlap Wreath & Decor


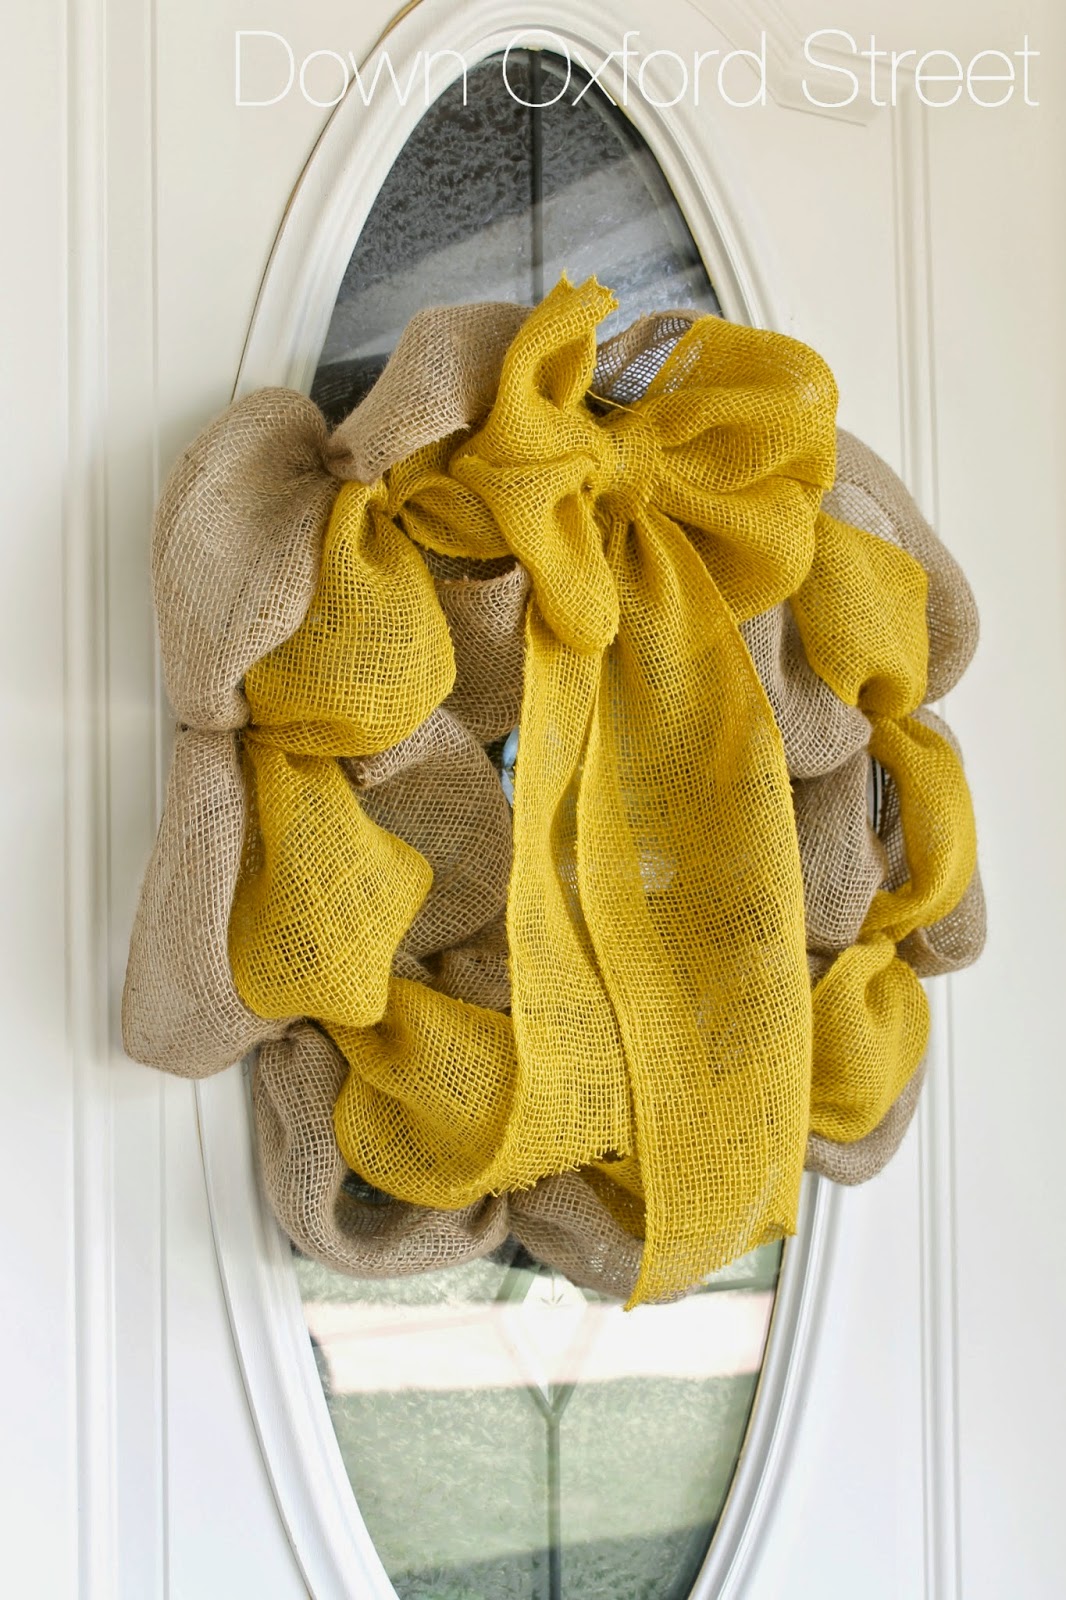
Summer has come to an end, and Fall has officially arrived here in the beautiful state of Georgia. I was really looking forward to decorating my front entrance this year, because we recently finished building a patio. 
For this year's fall wreath, I decided to make something simple; I have a lot going on around my door with a nice sized hay stack, pumpkins, and beautiful mum flowers. I didn't use the monogram letter or the chevron ribbon because the entrance was already so full and lush. 

Here is how I made a fluffy, bubble burlap wreath:  

Start by taking a handful of pipe cleaners and cut them in half with craft scissors.

Start with the main burlap ribbon. Scrunch one end of the ribbon, bring it up from underneath and around the clamp. Secure with a pipe cleaner.


Start weaving the burlap through each clamp and secure with a pipe cleaner. 


Repeat the steps above until you get something like this. 


For the bow, you'll need to cut 2 strips of burlap at 21 inches long.  

I have no idea what happened to the colors in this picture....Sorry 'bout that.

Fold the two strips of burlap in half (separately, not together) and bind together with hot glue.

Pinch the middle and secure with pipe cleaner.

Ignore the green paint on my arm.

Cut one yard of burlap and scrunch in the middle. 


Bring the 3 pieces of the ribbon together. Secure everything with a pipe cleaner, and add a small strip in the middle. 


Slide a pipe cleaner through the back of the bow to easily attach it to the wreath.


Thank you so much for stopping by, and I hope you have a warm and cozy Fall season! 

Have you seen last year's fall wreath

post signature

Thursday, September 18, 2014

Bourne Southern Shop + Coupon Code

I'm always very flattered when I get asked to review products, but this review is unlike any I've done because what I got sent to me was handmade by a sweet friend of mine, Megan. If you haven't visited her Etsy shop --Bourne Southern, you are missing out on some great handmade pieces of decor. Megan is a loving wife, sweet momma of 2 adorable little boys. She works hard to cater to their needs and runs an awesome Etsy shop. I promised her I would give you a true and honest opinion on all the things she sent me so, here it is. 

I LOVE EVERYTHING! Honestly! 
&


Here is some info about each piece and what Bourne Southern can do for you! 


The personalized family name signs are completely customizable, you can choose from different background colors, font colors, and fun fonts that can be found in the shop


Extra large scrabble tiles are my absolute favorite! I love them because they are rustic and modern at the same time, no matter what style you like they will look perfect in your home. For $20 you can finish up a wall gallery, add a monogram initial to a bedroom, or add it to that corner in your kitchen that needs a little personalization --like I did!  


Last but not least, are Bourne Southerns' famous large scrabble tiles. These wooden tiles are so fun! And what's even more fun is the price. They are only $5 each! Perfectly cut, stained, and hand painted by Megan herself. You can spell any word or phase. They make such great wall decor, baby or wedding shower gifts, and photo prop! 

I was also informed that Bourne Southern will start carrying Scrabble Racks, which will allow you to display smaller letters on a mantle or table rather than hang on a wall!

Doesn't all that sound so fun!? Here is the best part about this review. 
I get a coupon code to share with all of you! 
Through September 28th, use coupon code "OXFORD10" at checkout to receive $10 off any $60 purchase or more. 


Extra Large Scrabble Tiles


Personalized Family Sign


Large Scrabble Tiles


Shop Bourne Southern: http://www.bournesouthern.etsy.com 
Email: bournesouthern@gmail.com

Remember to use coupon code "OXFORD10" at checkout to receive $10 off any $60 purchase or more. 
post signature

Monday, September 1, 2014

DIY Wood Shim Wall Art

Do you have that one wall in your house that whatever you hang on it just doesn't look right? Well, I have a few in my house and the wall next to my couch was one of them. I wanted something long and big to cover most of the area, and after seeing this piece from Shanty 2 Chic, I knew I had to make it. 
I ended up having most of the wood from previous projects so I only spent around $8 for the whole thing! 


Here is what you'll need to create this piece:
2x4 plywood - I cut mine to 1 1/2 x 4.
2 packs of shims - The longer ones 
2 - 1x3 furring trim
2 - 1x2 furring trim
nail gun 
wood glue
jig saw
stain 
white paint
** I completely forgot to take pictures of some steps but I will do my best to explain them. You're smart, you'll figure it out ;) 


 I used a piece of plywood that I had leftover from a previous project. You can buy and use nicer wood for this.


Find the middle and draw a line straight down. Start putting your shims on the board by gluing and nailing them on. Shims are thicker on one side and gradually thin out. Rotate the shims as you're applying them on to give it texture.

 Here is where I missed taking the pictures because while making this, I was also making sure my son wasn't doing anything crazy. Can you see his arm in the down right corner above? :) 

Here is what I did.

  • After gluing and stapling all the shims to the board,  I used a jig saw to cut all the extra wood that was hanging over the edges. 
  • Cut and nail in the 1x3 trim on all the edges. 
  • Cut and nail in the 1x2 trim on the inside of the piece, along the 1x3 trim.


 I stained the whole thing using a sponge applicator, let it sit for 10 minutes, then worked the stain into the wood with a clean rag.


 Let it dry for a few hours.


 I wanted to give this piece a little more character, so I decided to white wash it. I love white washing because it's so easy and gives the piece a unique color. 
All you need is 1 part paint and 3 parts water. 


Mix the paint and water together. Working in small sections, roughly brush the white wash on and wipe with a clean dry rag after a few seconds. 


 Let it dry over night and, that's it! How easy does that sound? 


I absolutely love how it turned out and it's the perfect size for my space. 
Feel free to SHARE & PIN this for your future projects! 
post signature